Try-On Button
Real-time virtual glasses try-on. Includes a Glasses Removal feature, so nearsighted shoppers can try frames without removing their own.
Add Try-On, 360° View and Pupil Distance measurement to your Shopify store — no code, no developer. Follow the steps below and you’ll be live by tomorrow.
What you’ll get
After integration, these features appear automatically on your collection and product pages.
Real-time virtual glasses try-on. Includes a Glasses Removal feature, so nearsighted shoppers can try frames without removing their own.
A full interactive 3D product view — shoppers see every angle, just like in a physical store.
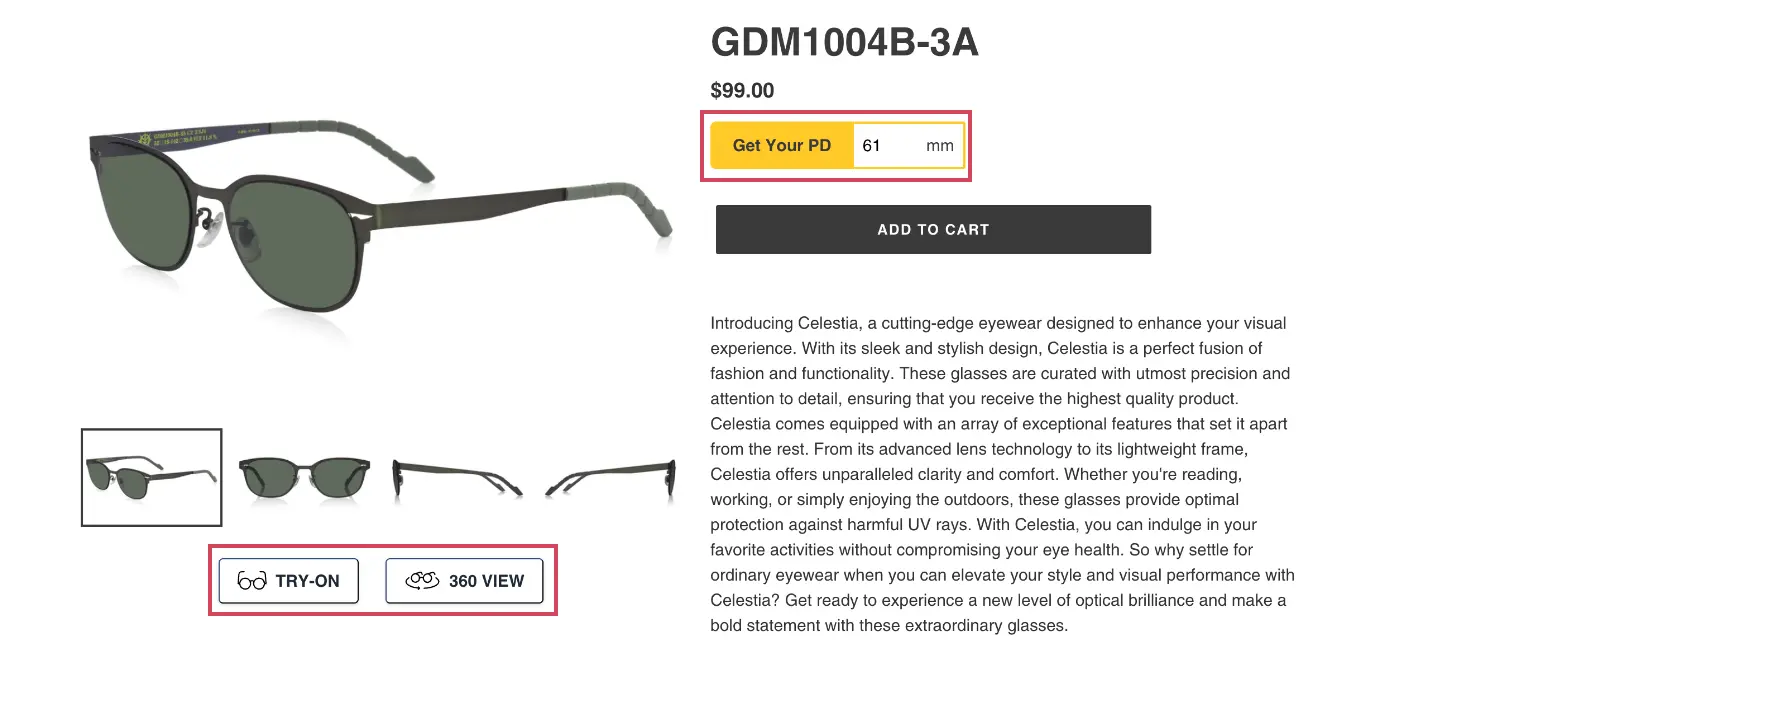
Customers measure their Pupil Distance online. Result is automatically attached to the order note.
Integration steps
Follow these three steps once. Everything stays in sync from your Shopify admin afterward.
Step 1
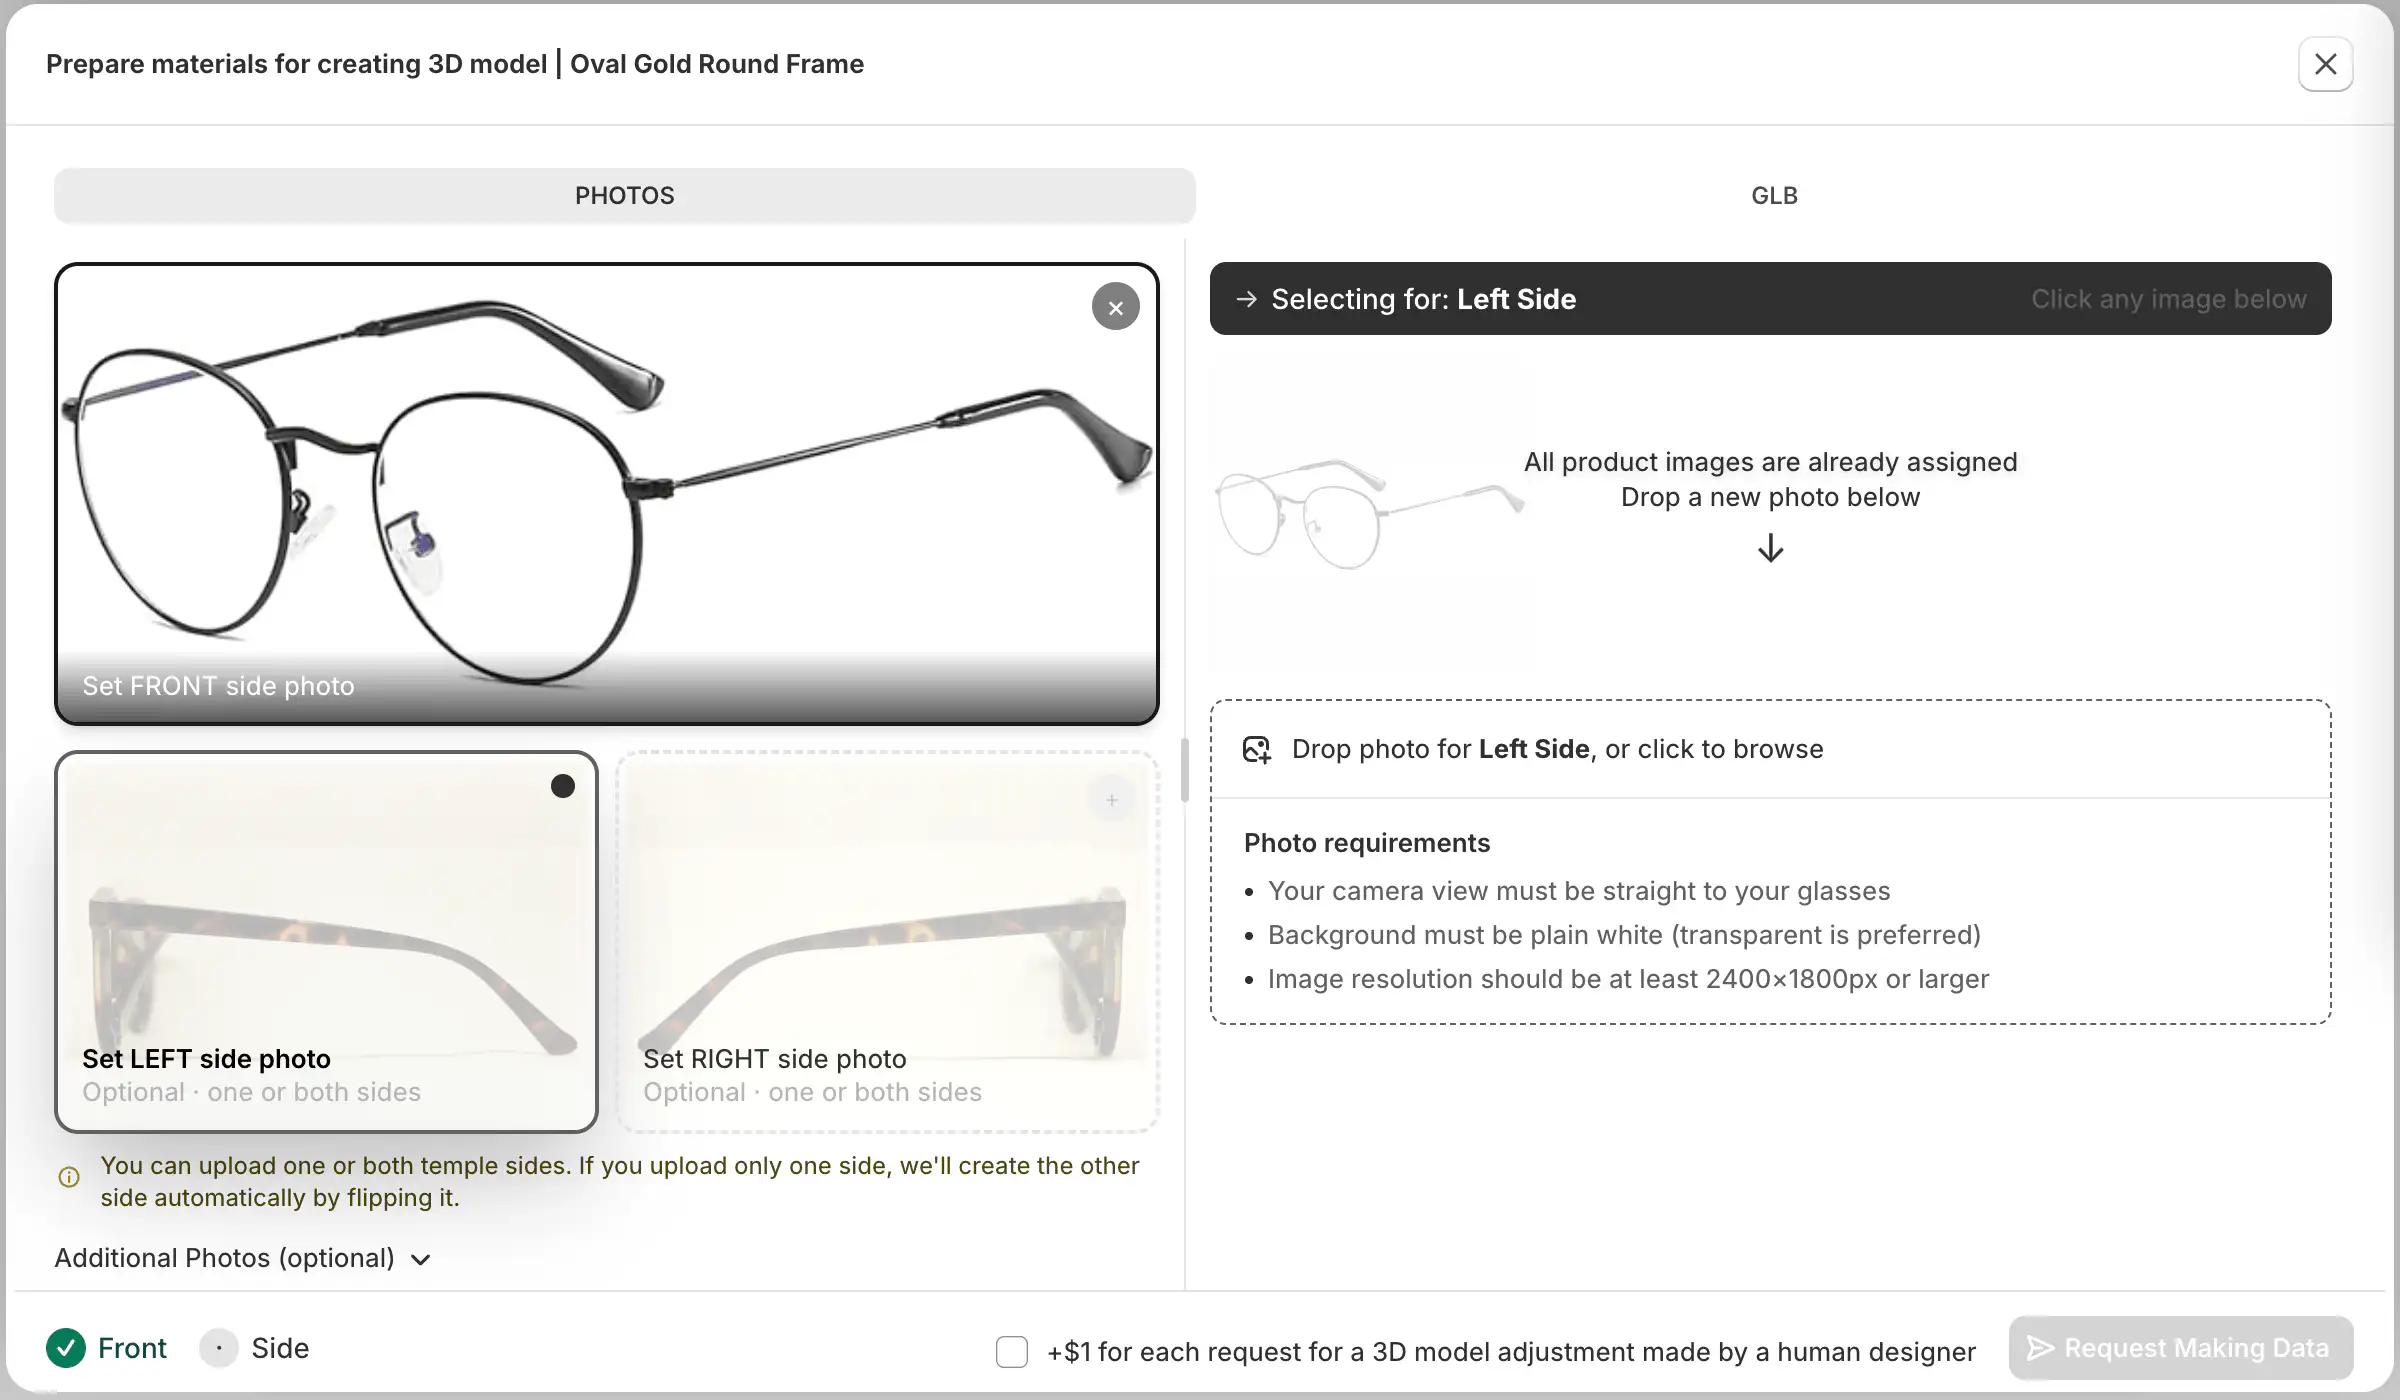
Open the GlassOn app in your Shopify admin and head to your product list. Pick the frames you want Try-On enabled for, and we’ll start building a 3D model of each.
Making Data
button to upload the required reference photos for each product.
Step 2
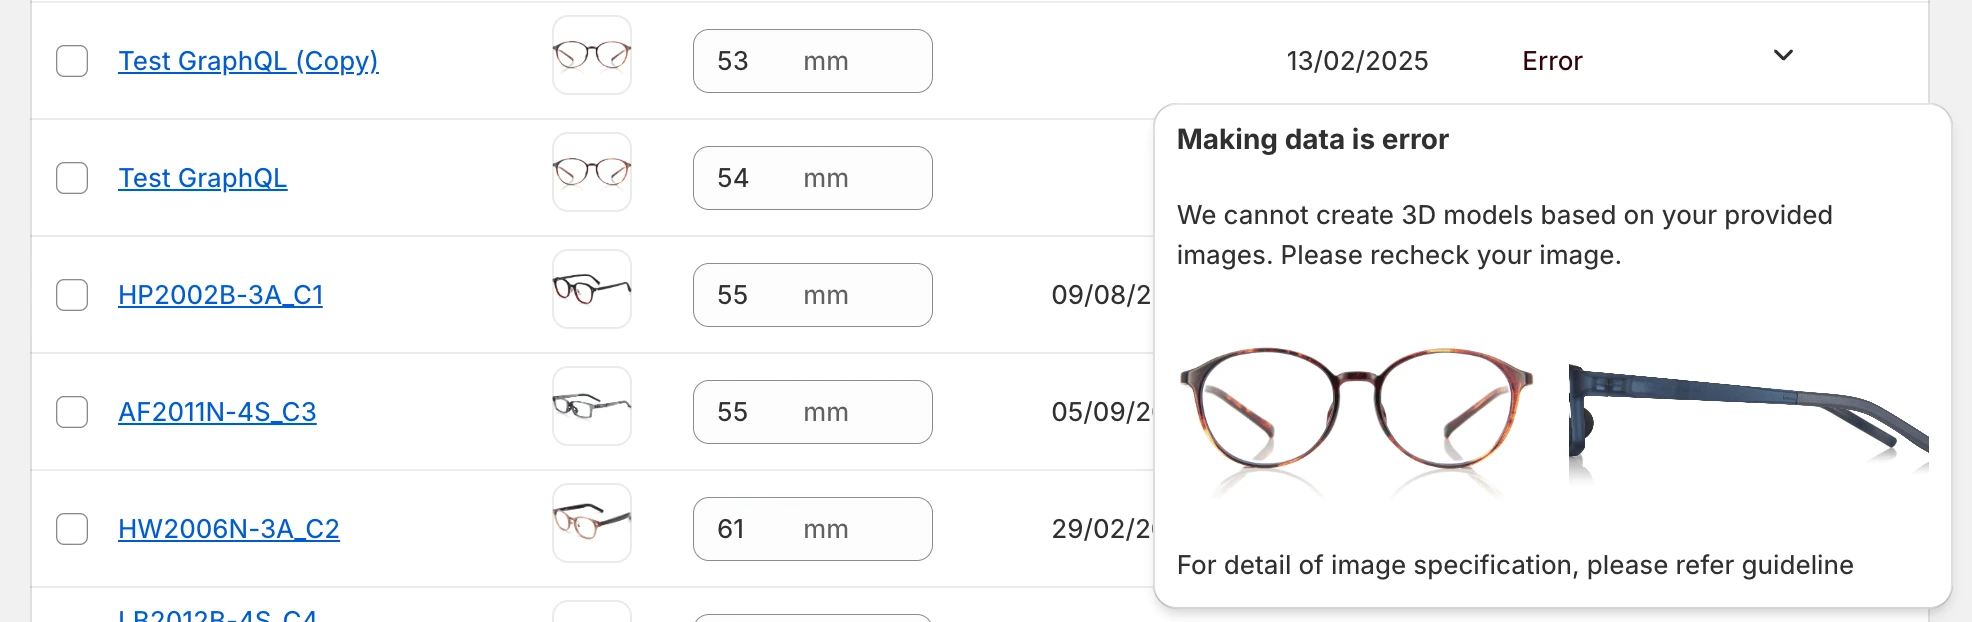
Once the 3D model is ready (usually a few days after submission), the Making Data button transforms into an ON/OFF toggle — giving you full control of which products appear with Try-On on your storefront.

Step 3
Controls live in your Shopify Theme Editor. Instructions differ slightly between OS 1.0 (classic themes) and OS 2.0 (Dawn-based themes) — use the toggle above to switch views.
Customize.
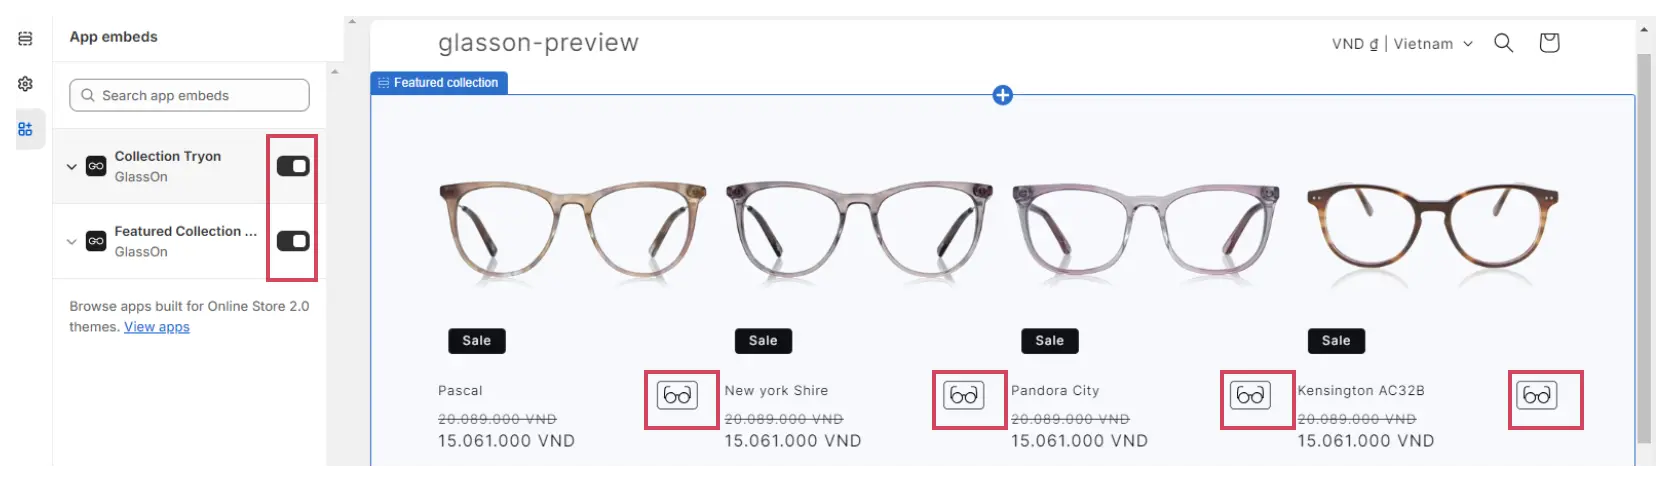
Nothing to do here.
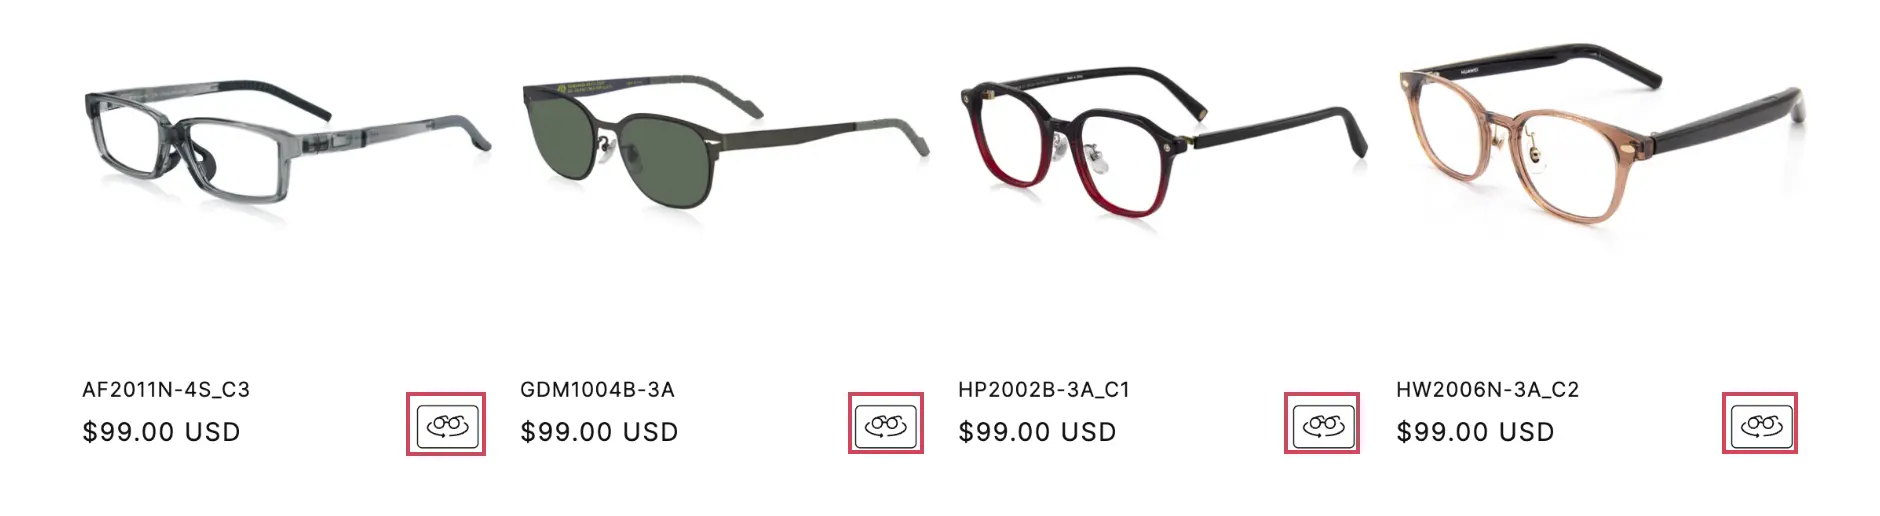
Try-On & 360° View buttons are embedded into the product page automatically on OS 1.0 themes — no block setup needed.
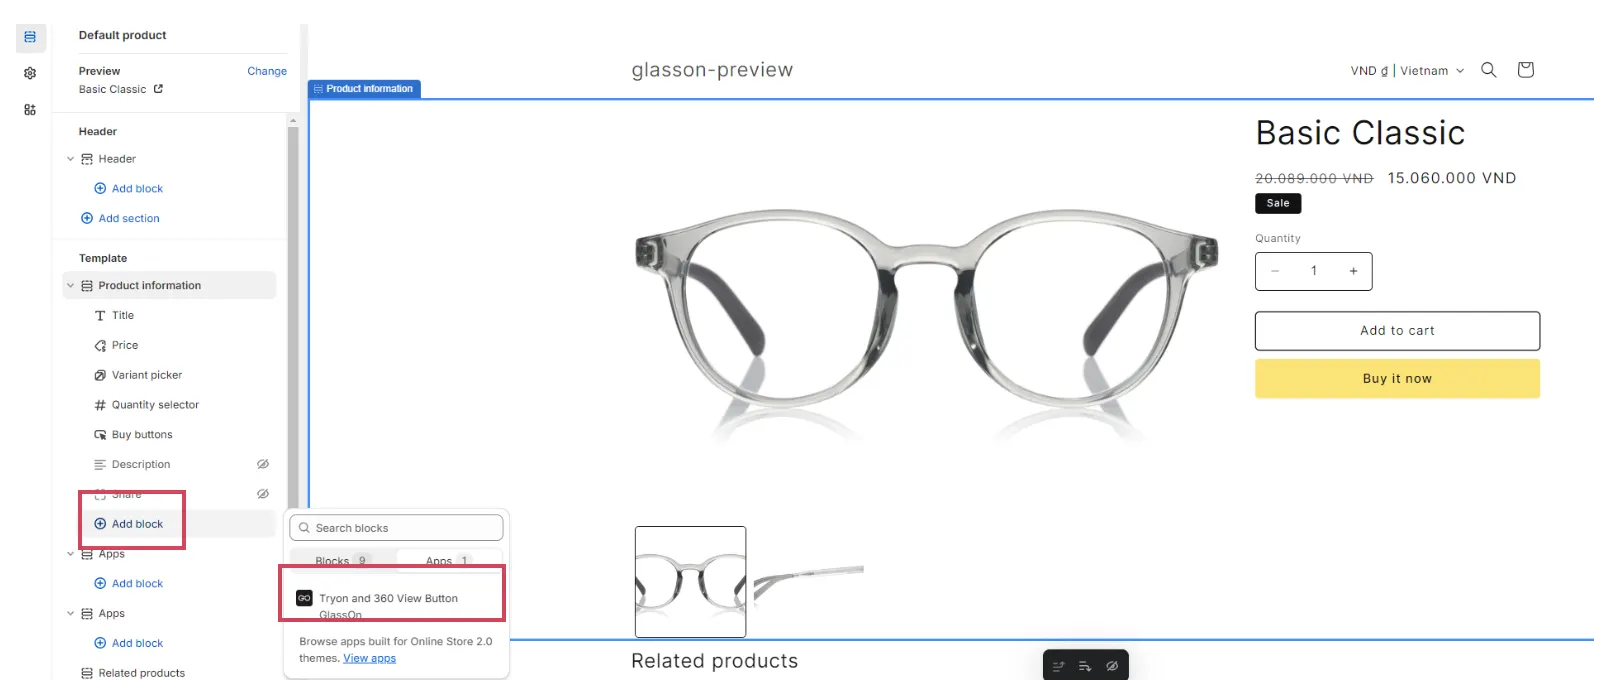
Add Block
and add the Tryon and 360 View Button block.
Step 4
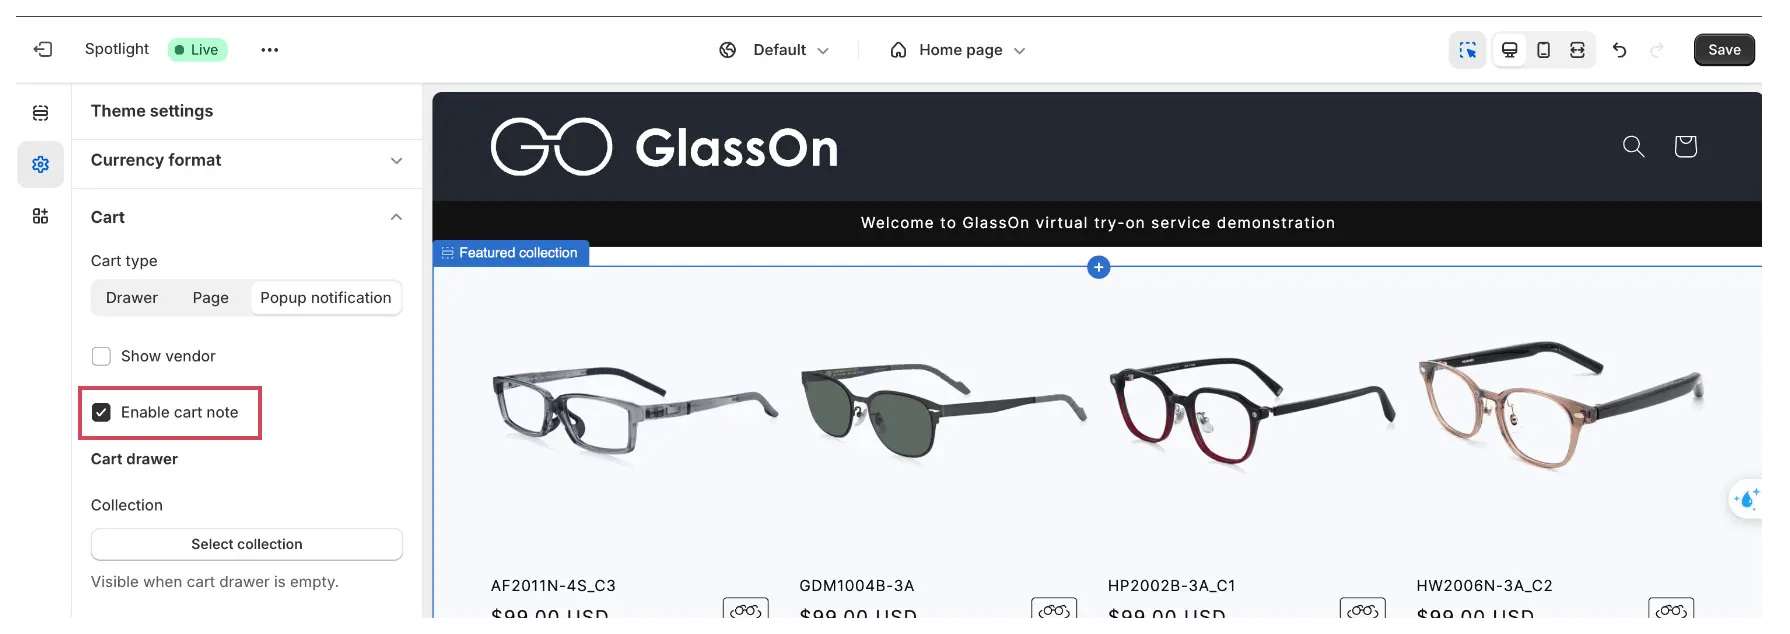
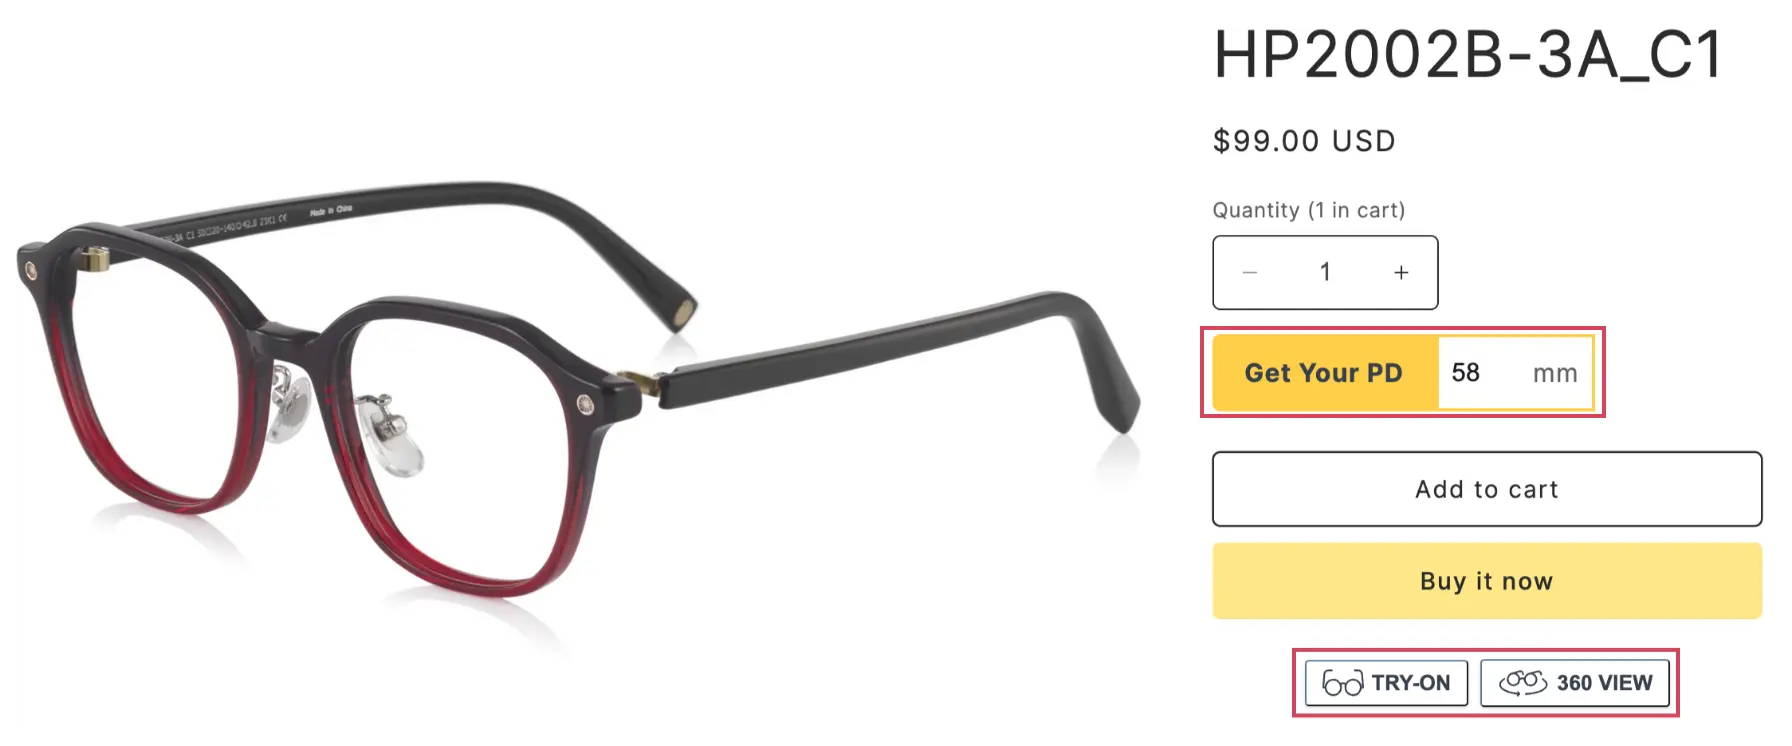
Try-On auto-fits by default. Add the lens width to unlock precision fitting when combined with your customer’s PD.

Pupil Distance
Let customers measure their own Pupil Distance online. The measurement gets attached to their order automatically.
In the GlassOn admin, open PD Measurement from the left menu and flip the On/Off toggle. That’s the whole setup.
Each customer’s PD result is automatically saved to the Order Note visible on the Admin order page.

Add Block
→ add the Get Your PD block.

In the GlassOn admin, open PD Measurement and flip the On/Off toggle.
Each customer’s PD result is automatically saved to the Order Note visible on the Admin order page.
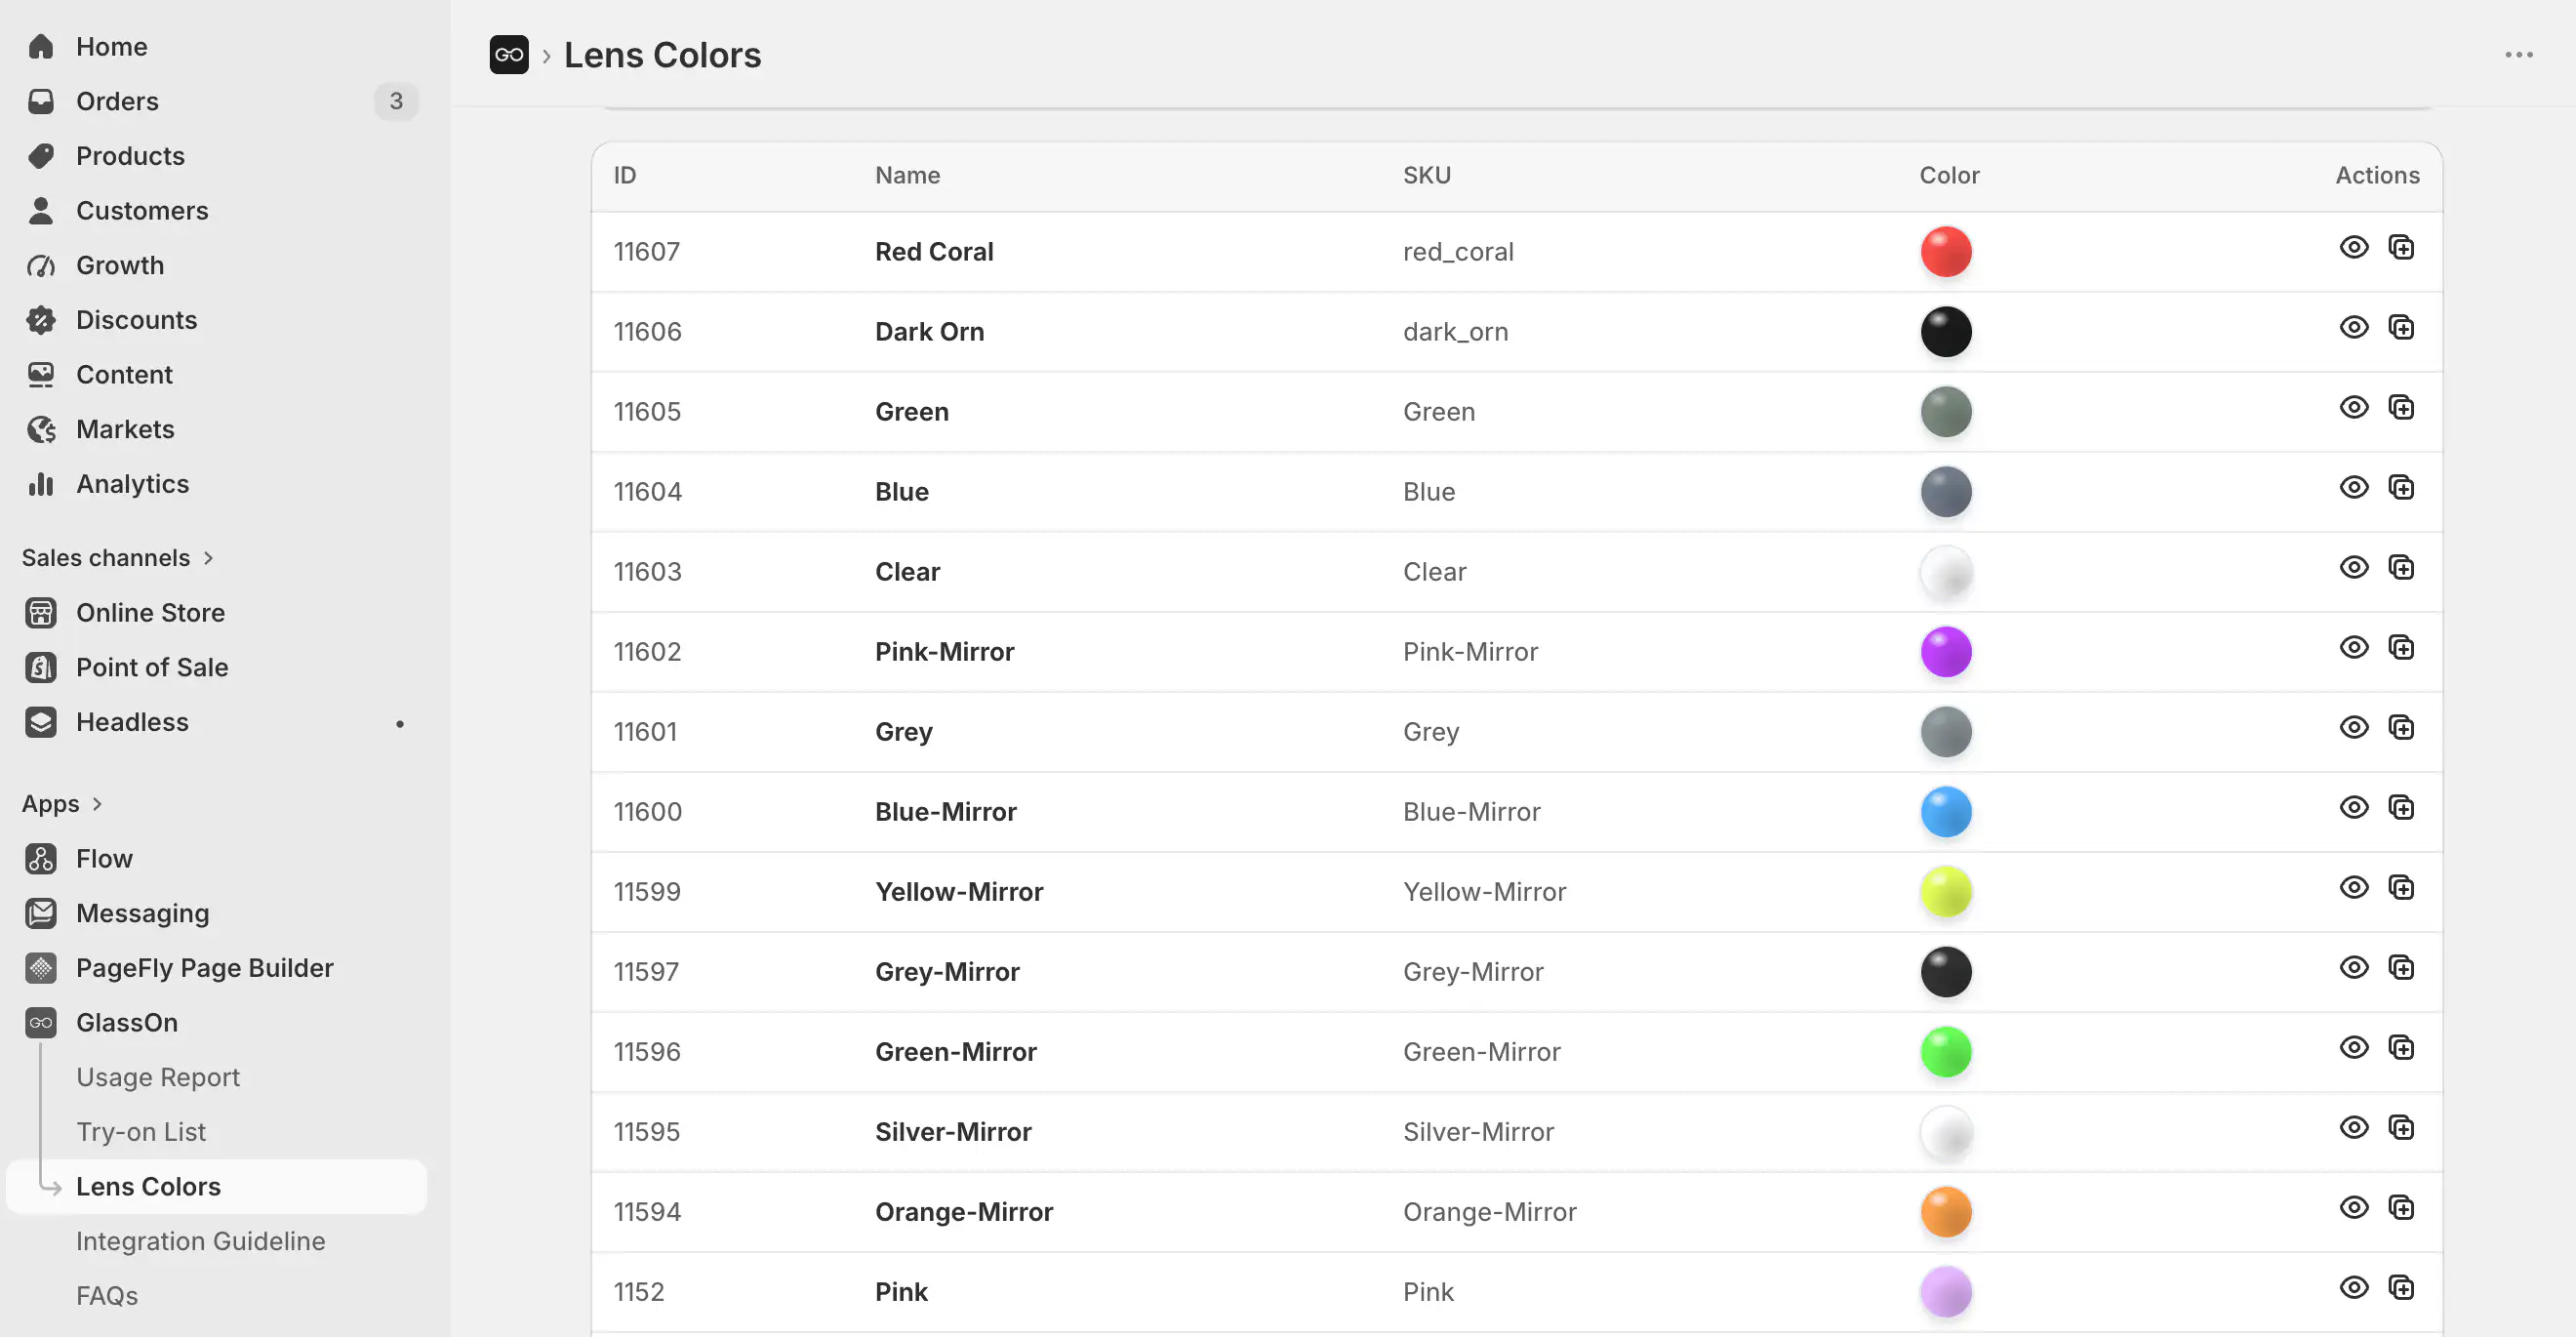
Build your colors once, assign them per variant, and Try-On opens on the exact shade your shopper picked — all from the GlassOn admin, no theme changes.
Create custom lens colors — tint, mirror and polarized finishes — once in Lens Colors, then reuse them across your whole catalog.
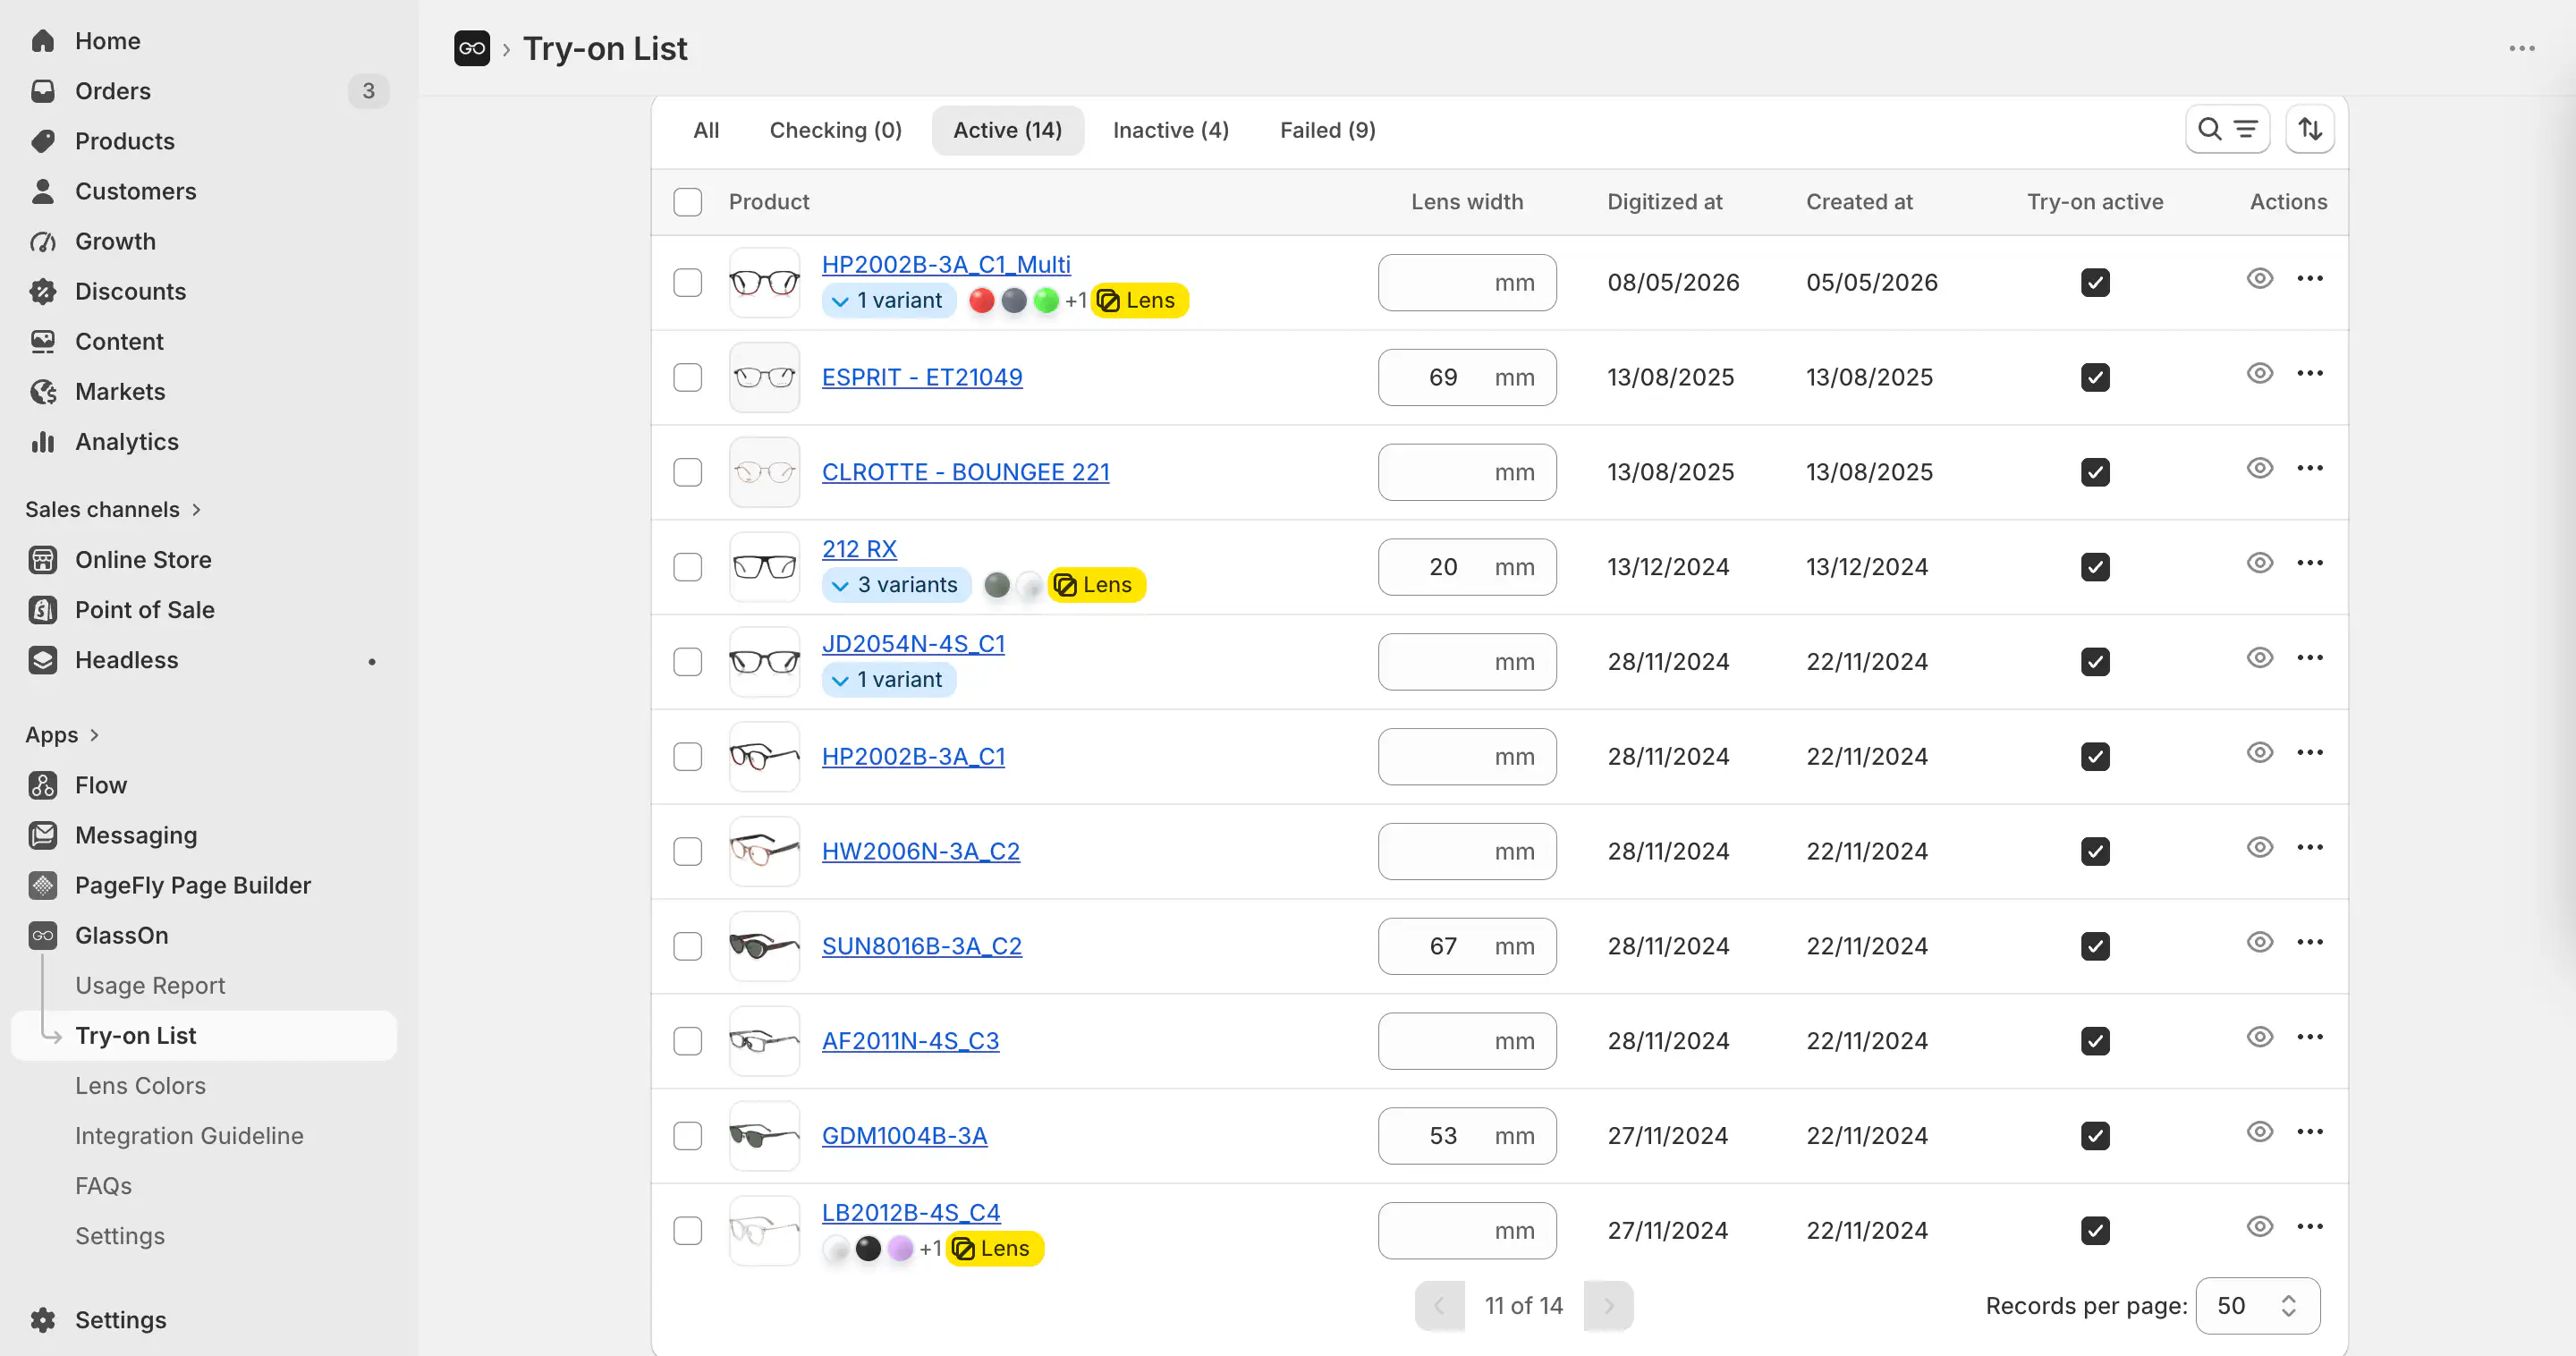
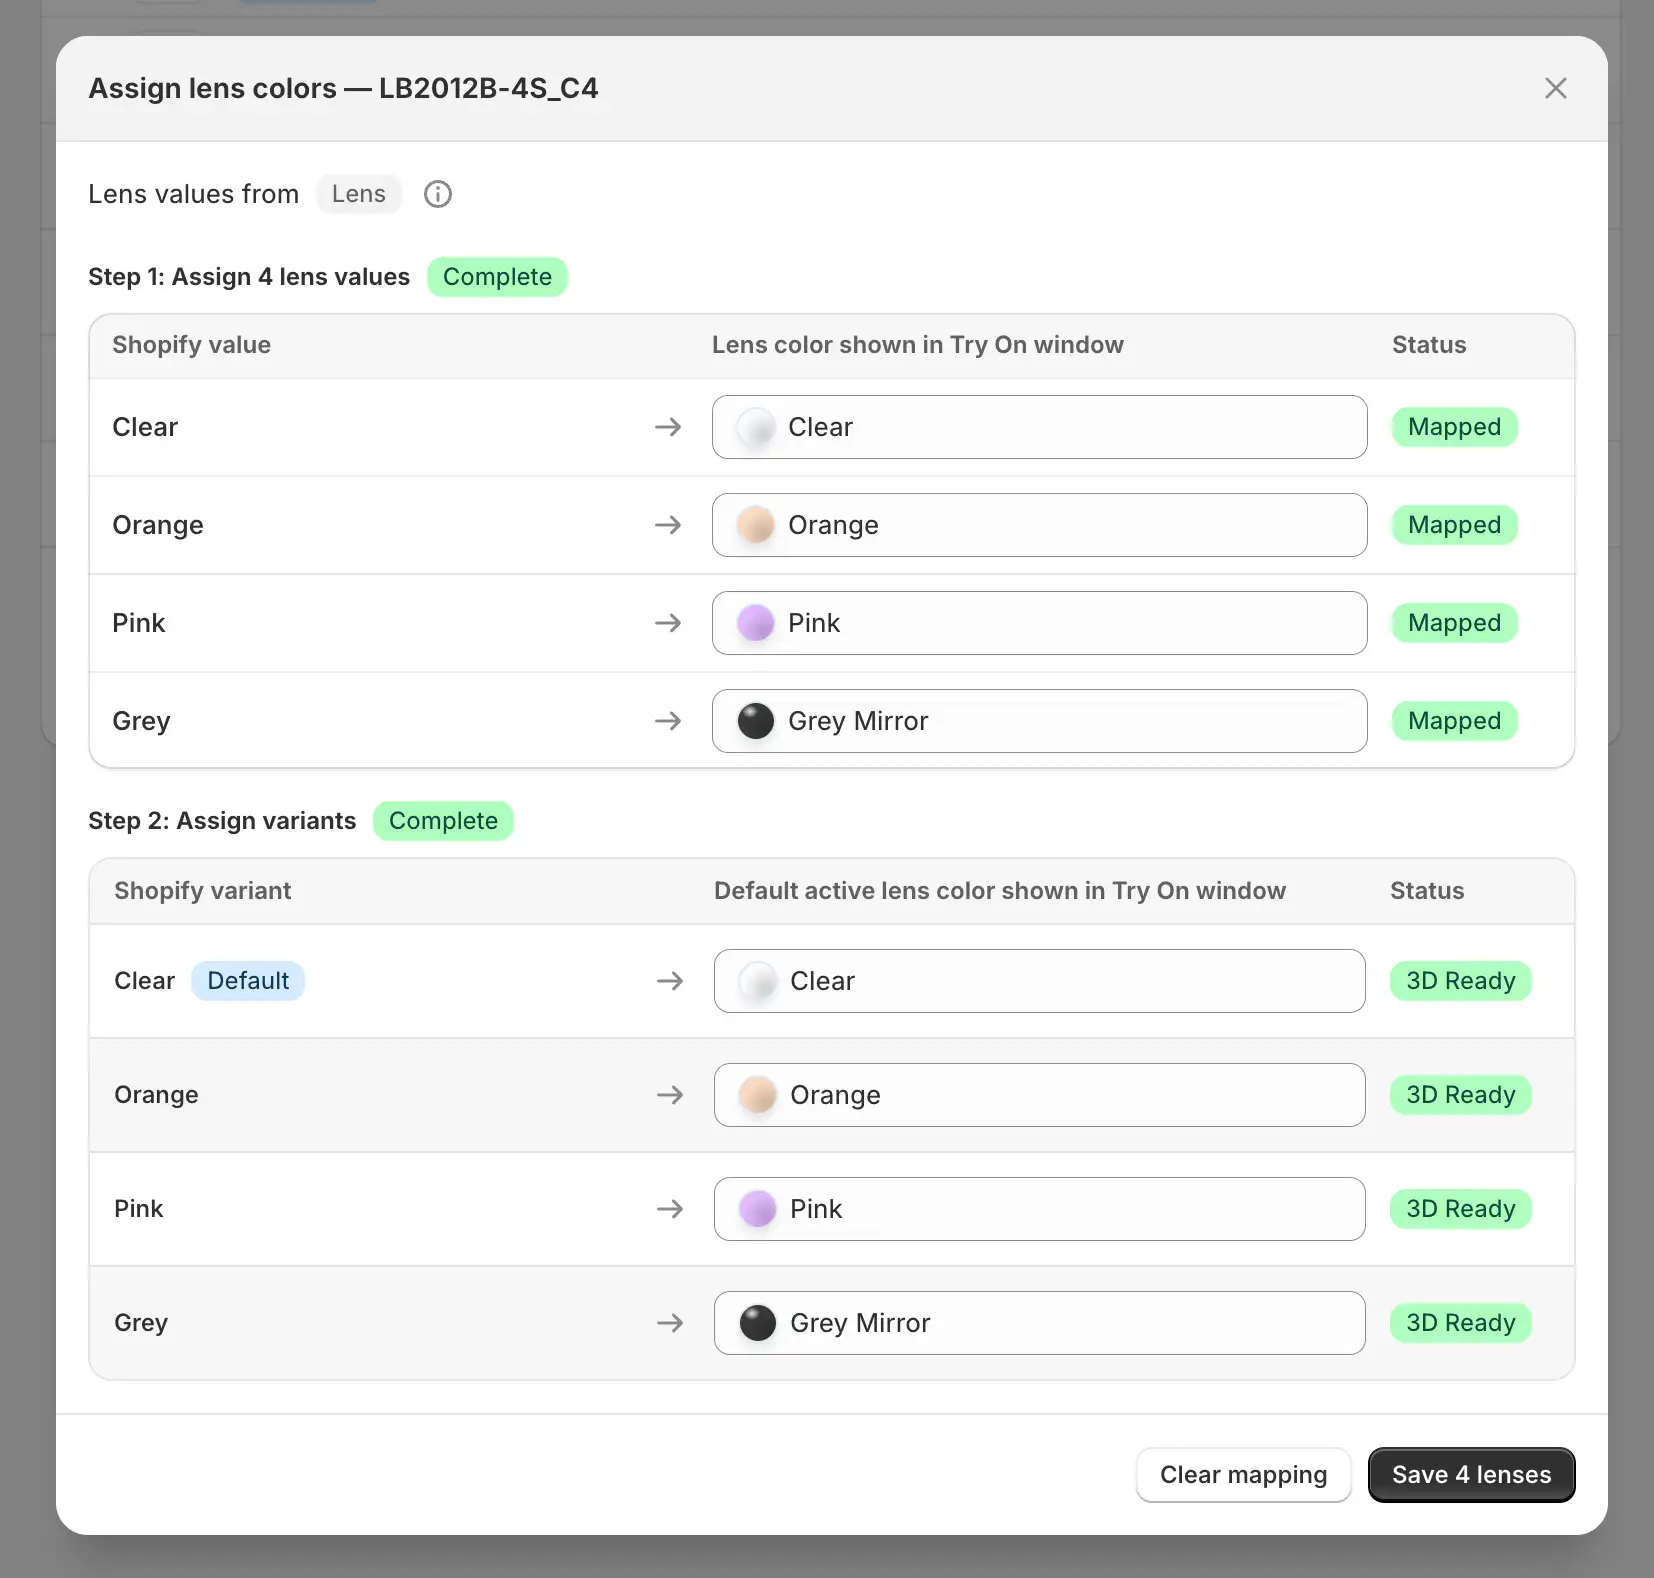
From Try-on List, open Assign lens colors. GlassOn auto-matches your existing Shopify color options, so setup takes seconds.
In Assign lens colors you set the default per variant, so Try-On opens on the exact lens color the shopper selected — always matching the variant they’re viewing.
That’s all
If the default design doesn’t fit your brand, our team can tailor the buttons, flow, and styling to your store. We’ll work with you directly — no ticket queues.